Showing posts with label Sally Hansen. Show all posts

Sunday, February 5, 2012

Mom's Nails!! A Valentine's Mani

It has been a really long time since I posted Mom's nails on here!! I have been doing them, I just haven't had much of a chance to get pictures of them! I decided to do a Valentine-themed mani on her with OPI DS Reflection. I am really pleased with how these turned out and I love DS Reflection! I used Sally Hansen Insra-Dri Whirlwing White withthe following stamping plates:
BM17 on Index and Ring Fingers
BM02 on Middle Finger
BM03 on Pinky and Thumb


I hope you enjoyed Mom's Valentine's Day-themed mani!

Saturday, December 17, 2011

I'm Dreaming of a White, Blue and HOLO Christmas!!!!

Hello lovelies!! I am very excited about this mani! When I originally posted Glitter Gal H721 Marine Blue Leah Ann from Llarowe made a comment that it would look awesome with snowflakes. I, of course, had to agree!

 I love the way this turned out. I stamped the snowflakes with BM14 using Sally Hansen Instant-Dry in Whirlwind White and China Glaze Cheers to You. On my ring finger I did an accent nail and wanted to make it look like snowfall. I did the dots with Whirlwind White and a small dotting tool. Then I sponged on OPI Crown Me Already and China Glaze Snowglobe. I loooove it!! Since I live in the desert I won't be seeing snow in person so it's nice to see it on my nails!!

First up, my gorgeous holo base of Glitter Gal Marine Blue. This is two coats topped with Orly Sec 'N Dry. The holo in these awesome Glitter Gal polishes is unaffected by top coat.

Isn't it GORGEOUS?!?!

Now for the snowstorm!!


 The color is too light in this one but I kept it because it shows the detail so well. :)


What do you think of my snow-filled mani? Glitter Gal polishes can be purchased at Llarowe, along with a ton of other awesomesauce brands! She ships internationally, (with the exception of Italy) has wonderful customer service and very reasonable shipping rates!

Sunday, November 20, 2011

My Twilight-Themed Breaking Dawn Mani!!

Hello again lovelies!! Time to show you my Breaking Dawn mani. :) It didn't turn out exactly as I had planned, and it is not perfect, but I am still pleased with it. I was planning on representing the cover of each book on four nails (not an exact replica, just a representation) and then doing feathers on my thumb for the part in Breaking Dawn where Bella wakes up covered in feathers. I tried free-handing the Eclipse ribbon and failed...I would have tried longer but I ran out of time. So, sadly, Eclipse is not represented....I just did feathers on that finger as well. I will post a pic of the book covers first, for any of you that may not be familiar with them. 

Twilight, New Moon, Eclipse, Breaking Dawn

Here is a pic of the full mani (minus my thumb which is the same as my middle finger)....

Is that a chip on my ring finger?! GRRR That's what I get for using cheap polish and waiting 24 hours to take pics. Sorry!

Now for an explanation of each finger...
 My Twilight tribute....I didn't have an apple in my plates but I did have the Twilight water slide decal. I applied it and sponged around it with black and OPI I'm Not Really A Waitress

My feathers from BM15 ...if you've read Breaking Dawn you know why I included this. :) I am very happy with how my feathers turned out! 

 My chessboard for the Breaking Dawn cover...I used BM17 and this pattern is actually a tip pattern, not a whole nail pattern. I had to try to line them up, which was hard. I ended up smudging them and they turned out kind of crooked. Not 100% happy with it but I didn't have time to re-do it. They do look better in person than in this pic though.

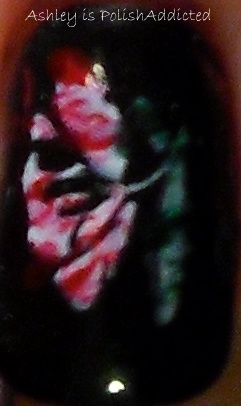
 I am, by far, happiest with this nail. My New Moon flower...I think it turned out really well! I used BM06 and stamped with white, then I took my small dotting tool and went over it in spots with OPI I'm Not Really A Waitress for the flower and China Glaze Glittering Garland for the stem.

One last shot of the complete mani. :)

Colors used in this mani were Sally Hansen Xtreme Wear Black Out, Sally Hansen White Tip, OPI I'm Not Really A Waitress and China Glaze Glittering Garland.

What do you think of my Twilight tribute? I wish I had had more time to make them better but it is what it is. :) I'm sure I will be re-creating it at some point. LOL

Tuesday, November 1, 2011

Ozotic 531 Over Black!

Hello everyone!The polish I have for you today is simply amazing! It is brand new from Ozotic and it is one of their new mish-mash polishes. The mish -mash line from Ozotic is both multi-chrome and holographic! They are so amazingly gorgeous!

One thing you need to know about multi-chromes (or duo-chromes) is that you have to layer them over a dark color to bring out their amazing color-shifting abilities. Today I have layered this over a black creme, I will be doing another post tomorrow on 531 over a different color so you can see how it changes depending on your base color.

This polish shifts from an amber color to a reddish purple...I could see green in sometimes but I couldn't seem to capture that in the pics. In the pics are 2 coats of Ozotic 531 over 1 opaque coat of Sally Hansen Black Out. I put Orly Sec 'N Dry over my index and ring fingers and left my middle and pinky fingers without a top coat so you can see that top coat does not dull the holo in this polish. 
I'm sorry this looks a little sloppy....I didn't notice it until I was editing the pics and since it's almost bedtime for me, I could not take new ones.


This is my favorite picture of this polish...you have the blurred holo on the index finger but you can see two different colors on my other fingers!


*This product is no longer available for purchase.*


*Product provided to me for my honest review.


.


Monday, October 31, 2011

Mom's Candy Corn Mani!

Happy Halloween everyone! I have 3 posts that I am planning on doing today but it's been a crazy day and is going to get crazier so please bear with me!

I went back to my favorite nail art technique for this mani....sponging! I love candy corn nails! I had done them on myself earlier in October but it was before I started blogging so I wanted to do them again and show you guys! 

For this mani I used Sally Hansen White Tip, Revlon Tangerine and China Glaze Solar Power. For her ring finger I used a waterslide nail decal that features Snoopy sitting on top of a Jack-O-Lantern (I love "It's The Great Pumpkin, Charlie Brown"). All nails were topped off with Orly Sec 'N Dry. I hope you like this mani as much as I do!

 There was candy corn harmed (or eaten) during the making of this photo. ;) LOL


I hope you enjoyed this mani!

Saturday, October 29, 2011

Mummy Time!

Happy Saturday everyone! I attempted another tape mani late last night. It took me about 4 hours and I am still not happy with it. LOL But since it did take so long I felt I had to post it. 

I followed another tutorial from nailside that I thought was so cute. Unfortunately, mine did not turn out nearly as good as hers. (You can see her tutorial here.) I think my problem was in the color I chose to put over the tape - it is a dark color and I needed to put it on pretty thick to get it opaque. This was very problematic for peeling off my tape...which resulted in jagged edges instead of clean lines. But, that is kind of mummy-ish, right?! I mean, their wraps do not have clean lines. LOL It looks worse in the pics than it does in real life. Close-ups are not good for problematic manis. 

I used Sally Hansen White Tip for my base color (I am not a big fan of this polish, it was very streak and I had to put it on pretty thick) and China Glaze Naughty and Nice for my wrap lines. 


So, what do you think of my mummy nail art? I hope you like it!!! I wish my lines were cleaner.

Friday, October 28, 2011

Sparkly Gradient Halloween Mani!

Happy Friday everyone! I am so glad it's almost the weekend! I have a busy one planned...I will try to post every day but I'm not sure I'll have the chance. I have some good manis planned out in my head so I hope I have time! 

Today I have another post featuring my mom. As I've said previously, I do her nails as often as I do mine so it only seems right to feature her nails on here occasionally. LOL I wanted to do something fun and sparkly and I was in the mood to sponge. I love sponging, it is one of the few nail art techniques that I can actually pull off. I believe anyone can do this - it just takes a little practice. 

As a "bonus" to this post I will add a pic at the bottom of my first ever gradient sponging mani. Please keep in mind this was from awhile ago (way before I started blogging) and my picture-taking skills were non-existent so the picture is very blurry, but it does show that someone who's never done this before can do a good job!

For this mani I started out with a base of Sinful Colors Courtney Orange (I have a love/hate relationship with this polish...I love the shade of orange that it is but is takes several coats to become opaque) and then for the sponging I used Sally Hansen Black Out on the tips with Zoya Faye and Zoya Gabrielle in the middle to soften the line and add sparkle. I topped it off with Seche Vite - not my favorite top coat but it's good to use with nail art since it is so thick.


For this one I used a base of NOX Twilight in Poseidon and did the sponging in China Glaze Dorothy Who? and Zoya Charla. It reminded me of mermaids and ocean waters. :)

I hope you enjoy gradients! You'll probably see a lot more of them from me!

Thursday, October 27, 2011

Halloween Explosion!

Finally a new nail post! I wanted to do something fun and still Halloween-related. I tried several different Halloween designs only to be reminded that I fail at anything art-related. So, I decided to do a tape mani that I have done before with different colors.

I followed the tutorial from the amazing blog Nailside (see the tutorial here). She has some amazing designs and easy to follow instructions. Since I wanted to make it Halloween-themed I used black and orange (original, I know lol). For my orange I used 3 coats of OPI Ya'll Come Back, Ya Hear? and for my black I used 1 coat of Sally Hansen Black Out. I finished this mani off with Seche Vite. My edges look a little jagged in the pics but they looked clean to the naked eye. Darn macro setting. 


What do you think of my Halloween explosion? I think it's super fun!

Thanks so much for following and reading!
Don't forget to check out my Facebook page!

09 10