Showing posts with label Zoya PixieDust Collection. Show all posts

Thursday, November 13, 2014

Zoya Ultra PixieDust Collection for Fall 2014

Press Sample

Happy Thursday! I was sorting through some of my pics earlier and ran across some swatches that I took a couple of months ago. I could have sworn I posted these, but apparently not! I swatched these during the 31 Day Challenge and that is all a blur, so here they are now! The Ultra PixieDusts for Fall 2014.  (I did post a preview of them here if you would like to read more of my thoughts.)


Post continued after the jump!

Tuesday, September 16, 2014

Zoya Ultra PixieDusts for Fall 2014 - Swatch Preview (Skittles)

Press Sample

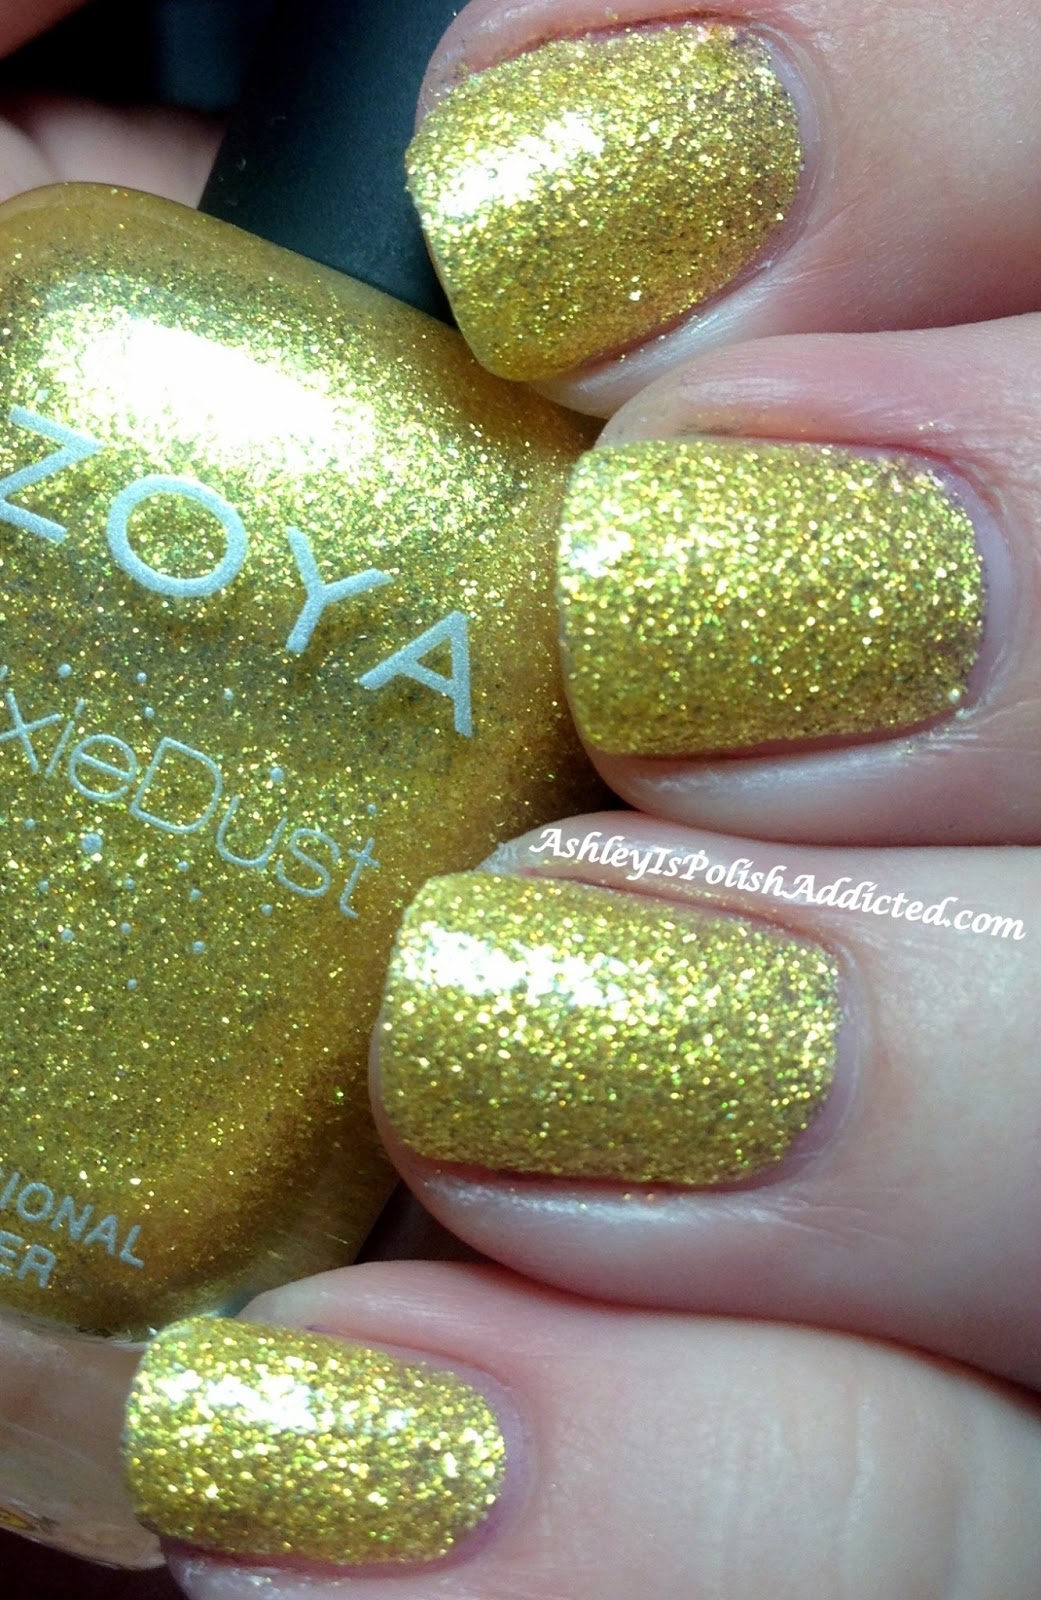
I received my Zoya Ultra PixieDusts today and I couldn't wait to try them out and share them with you! I will have full swatches soon, but here's a quick skittle pic to tide you over!  They are kind of a cross between the original PixieDusts and the most recent Magical PixieDusts.  They have the finish of the original PixieDusts with added large hex glitters (no holo glitters).


They are, of course, more sparkly in person than in the photo. The bases are deeper and Noir and Arianna are even a bit "jelly-like" - but do not dry smooth, of course. This is 3  thin coats of each and they are completely dry.

I decided I wanted to see them shiny so I added 2 coats of thick top coat (Pure Ice Girl on the Run).


What do you think? I quite like the finish on them, although I prefer them with top coat! I can't handle that texture feeling when I'm wearing them as a full manicure. I am disappointed that Oswin dries so much darker on the nail than it is in the bottle.


These are available for pre-order at Zoya.com!

Zoya polishes are available at zoya.com and at select Ulta locations and retail for $9. The PixieDust line retails for $10 each.  Zoya is also available at Nail Polish Canada

Zoya has sales and specials often so make sure  you follow them at the social media links below to stay up-to-date on all the latest! And don't forget they are 5-FREE and Cruelty-Free!


Thanks for reading and happy polishing! ♥

Sunday, September 7, 2014

PRESS RELEASE: Zoya Ultra PixieDust for Fall

Press Release

Who's ready for more Ultra PixieDusts from Zoya? This time they are rich and vampy!

Meet the next generation of our best-selling textured, matte and sparkling Zoya PixieDust formula ­ Zoya Ultra PixieDust! Three shades featuring both fine micro glitter and mega hex particles for tone on tone 3D effects. This easy glam nail is available in 3 shades in a gradient of red, wine and plum hues. No base or top coat required.


Post continued after the jump!

Wednesday, August 7, 2013

Zoya PixieDust Collection for Fall 2013 - Swatches and Review ♥

     Press Sample

Good evening! I'm sorry for my lack of posting lately, life gets in the way sometimes! Tonight I have the latest addition to the Zoya PixieDust family! 


This is my favorite collection of PixieDusts so far!  The colors are so RICH, that's really the best way I can describe them. These are highly pigmented and very sparkly. The formula and application was perfect on all of them. Some of them were nearly one-coaters but I used two coats in all of my photos. All photos feature one coat of Poshe top coat on the ring finger, all other fingers are without.


Photos after the jump!

Monday, April 22, 2013

MANIc Monday With A Tutorial For My Rainbow Gradient (Snow Cone) PixieDust Mani!

Good evening! After posting my Zoya PixieDust review and nail art post on Friday (if you missed it you can find it here) I had a lot of people asking for a tutorial on how I achieved the look. So, here is my very first tutorial! Since this is my first I'm just winging it here so if you have any questions feel free to ask in the comments and I will be happy to answer. Now let's get to it, shall we?

I called this a "rainbow gradient" in my original post but many people were saying it looked like a snow cone - which it totally does! I don't know why I didn't see it before - my readers are awesome! So now I'm calling it a Rainbow Gradient Snow Cone. 

Rainbow Gradient Snow Cone

--------------------------------

For this look you will need texture polishes (I used all six of the Zoya PixieDust Summer Collection), wedge makeup sponges, a non-porous surface (I used a stamping plate) and a toothpick or needle, etc.


I started by painting my nails with a plain white creme. I'm not sure that this was necessary because the polishes were completely opaque by the time I was finished but I do think it might have made them a little brighter. 

After your base is dry (or your bare nails are dry and free from oils) take the first two colors that you want to use (I only did two colors at a time, even on nails that had three colors) and paint a strip of each color the length of your nail touching each other (as shown below). 


Now take your toothpick and start gently dragging each color into the other (shown below). I initially tried swirling them but that didn't really work so I did several "lines" that created a similar effect. The goal here is to get rid of the harsh line because you will not be able to do this after you get it on your nail.


Next, take your sponge and press it directly on the polish -  straight down and back up. The photo below isn't my best attempt but since you are going to be doing more than one layer it doesn't have to be perfect. 


Take your sponge and press it directly on your nail and back up. No trying to "blend" or move it up and down - this just moves the texture around. As you can see below, I did not get it directly in the center of my nail as I did in my original mani. This can be corrected, if desired, in the following layer(s). 


Wait a bit for that layer to dry (it doesn't take too long before you can add another layer) and repeat.


You can do this as many times as you like to achieve your desired look. The photo above (on my pinkie) shows 2 layers using Liberty and Stevie. The photo below is 3 coats of Stevie and Miranda. 


Continue the process in the order you want. For nails that have three colors I still only used two color at a time - it just worked better that way for me. I didn't think to take photos of the cleanup but I used acetone and an eyeliner brush. It wasn't as bad as I had imagined it being. 

Rainbow Gradient Snow Cone


I hope you enjoyed this tutorial and you are able to re-create this look! If you do, please post a photo on my Facebook page - I would love to see!


Thanks for reading and happy polishing! ♥


.

Thursday, April 18, 2013

Zoya PixieDust Collection for Summer 2013 - Swatches, Review and Rainbow Gradient! ♥

Good morning! I have a super bright and fun post to show you today! 

Up until now I have been sort of back-and-forth on the textured polish trend. I wasn't crazy about some of the other brands' offerings. I really liked the previous PixieDust Collection but this collection just blew me away! I love all of these! In fact, I love them so much that I couldn't wait to do some nail art with them. 


Update: I had several requests for a tutorial for this mani. You can find it here

Zoya PixieDust Rainbow Gradient


I have to give my friend Jacki over at Adventures in Acetone credit for this idea. She did a rainbow gradient with the Zoya Surf Collection a year ago and I loved it so much it stuck with me. (To see her post, click here.) When I saw the PixieDusts I knew I had to try it!

I had a hard time capturing the sparkle and shine in the nail art photos. Make sure to see my swatch photos below for a better representation of the true color and finish!


Zoya PixieDust Rainbow Gradient

Zoya PixieDust Rainbow Gradient


-------------------------------------


This collection is made up of the following 6 polishes - 

Beatrix - light orange metallic sparkle
Destiny - red-leaning coral metallic sparkle
Liberty - marine blue sugar sparkle
Miranda - rose/raspberry sugar sparkle
Solange - yellow gold metallic sparkle (with real gold metallic pigment)
Stevie - lavender violet sugar with silver sparkle


The formula was wonderful on all of these. I only needed 2 coats for opacity although I did show what 3 coats looks like on 3 of the polishes (Destiny, Miranda and Stevie) on my ring finger only. These are meant to be worn without top coat (since they are textured) but I have photos with and without topcoat of all of them. 


Beatrix -


Zoya PixieDust Beatrix - no top coat

Zoya PixieDust Beatrix - no top coat

Zoya PixieDust Beatrix - no top coat

Zoya PixieDust Beatrix - with top coat

Zoya PixieDust Beatrix - with top coat

Zoya PixieDust Beatrix - no top coat

Zoya PixieDust Beatrix - with top coat


Solange -

Zoya PixieDust Solange - no top coat

Zoya PixieDust Solange - no top coat

Zoya PixieDust Solange - no top coat

Zoya PixieDust Solange - with top coat

Zoya PixieDust Solange - with top coat

Zoya PixieDust Solange - no top coat

Zoya PixieDust Solange - with top coat


Liberty -

Zoya PixieDust Liberty - no top coat

Zoya PixieDust Liberty - no top coat

Zoya PixieDust Liberty - no top coat

Zoya PixieDust Liberty - with top coat

Zoya PixieDust Liberty - with top coat

Zoya PixieDust Liberty - no top coat

Zoya PixieDust Liberty - with top coat

The last 3 show 3 coats on my ring finger only - 

Miranda

Zoya PixieDust Miranda - no top coat

Zoya PixieDust Miranda - no top coat

Zoya PixieDust Miranda - no top coat

Zoya PixieDust Miranda - with top coat

Zoya PixieDust Miranda - with top coat

Zoya PixieDust Miranda - no top coat

Zoya PixieDust Miranda - with top coat

Stevie -

Zoya PixieDust Stevie - no top coat

Zoya PixieDust Stevie - no top coat

Zoya PixieDust Stevie - no top coat

Zoya PixieDust Stevie - with top coat

Zoya PixieDust Stevie - with top coat

Zoya PixieDust Stevie - no top coat

Zoya PixieDust Stevie - with top coat

Destiny -

Zoya PixieDust Destiny - no top coat

Zoya PixieDust Destiny - no top coat

Zoya PixieDust Destiny - no top coat

Zoya PixieDust Destiny - with top coat

Zoya PixieDust Destiny - with top coat

Zoya PixieDust Destiny - no top coat

Zoya PixieDust Destiny - with top coat

So what do you think of this collection? What are your favorites? I love them all but my favorite is Destiny - it's just such a perfect coral. Zoya did a wonderful job with all of the formulas and colors - they are just perfect for Spring and Summer!


Zoya PixieDust Rainbow Gradient


Zoya polishes are available at zoya.com and at select Ulta locations. The PixieDust polishes retail for $9 and their other polishes are still $8. Be sure and "like" Zoya's Facebook page and follow them on Twitter for latest news and promos. They have a lot of sales and specials. Zoya appreciates their customers and knows how to keep them! And don't forget they are 5-FREE and Cruelty-Free!


Thanks for reading and happy polishing! ♥


*PR Samples provided for my honest review

.
09 10